 |
| Photo Credit Mitchell Giebels |
|
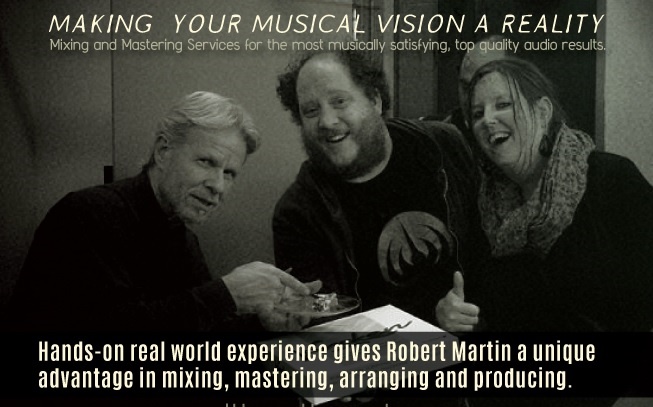
The Process and What's Included Here’s how the process works, from start to finish, and what’s included. Have a seat, there’s a lot of information here. Before we get into the details, let’s start from the end and look briefly at what the final result will be. When you entrust me to apply my knowledge, experience, ears and mad skills to your music, you will get a fully mixed and mastered, radio ready expression of your music that has clarity, detail, punch, depth, warmth, power, and most of all, expresses to the maximum every ounce of skill and emotion you yourself put into it. Sound good? Here's how we get there together. STEP 1 - Email me the details of your project First, contact me via email and we’ll discuss the details of your project. I want to know what you hear in your head for your music, and what FEELING you want it to portray to the listener. After we’ve both got a clear vision of where you want your music to go, I will give you a price quote and job order tailored specifically to your needs. Use PayPal to send the 50% deposit so I can get to work on bringing that vision into reality. The other half won’t be due until I deliver your mix and/or master. STEP 5 - Send me your tracks via WeTransfer (This is a free service) Now, open the session you recorded your music into and turn off and disable ALL plugins and effects, on all tracks and the master bus, and turn off any parallel processing. If there’s a certain effect you really want on any particular track, send me a rough mix that features that effect so I know what you’re after. A good option is also to send a copy of the individual track rendered with the effect you want and also a clean copy of that individual track with no effect. That gives us options! 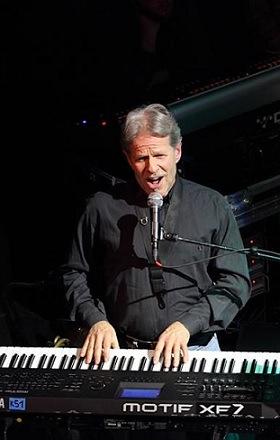
Now when you render the rest of your tracks to send me, they’ll be exactly what was originally recorded, raw, untouched, with no additional post recording processing, no EQ, no compression, no saturation, no effects. Make certain your mix bus is clean and unprocessed. Great! Now we’ve got a pure, natural sonic palette to paint with! Make sure that every track starts at exactly the same place, bar one, the very beginning, exactly where every other track begins. If you have things like background vocals that don’t come in until the chorus, or a guitar solo track that doesn’t come in until after the bridge, every track still has to start at the very beginning along with everything else, even if there’s nothing on that track but silence until it comes in at the chorus or solo, etc. If the guitar solo comes in at the downbeat of bar 56, the guitar solo track you send me has to have 55 full bars of silence on it before the guitar starts playing. Pretty much any modern DAW will allow you to render your tracks this way, and it’s the only way to ensure that everything shows up exactly where it’s supposed to in the song. Now render each separate track, or bounce or export or whatever your particular DAW calls the process, and make sure it has the correct name - kick, snare top, snare bottom, bass DI, bass amp, etc. The tracks can be either 44.1 or 48k WAV or AIF, either 16 or 24 bit. Now go to wetransfer.com This is a free service that allows you to send up to 2 GB at a time with no charge. Enter my email as the recipient and start loading your tracks. If your project is larger than 2 GB, fit what you can in the first send, then continue with the rest in a separate send. Be sure you’ve included every track. Wetransfer will automatically send me notification that you’ve uploaded the tracks and supply me with the download link. Just to be sure though, it’s also a good idea to send me an email to let me know you’ve uploaded your tracks to Wetransfer. STEP 6 - Robert works his magic! As soon as I get the tracks, I’ll load them into my DAW and get to work! My DAW of choice is Logic Pro X, which I’ve used since 2000 when I was composing for Baywatch and Lifetime Television Intimate Portrait series. Any DAW can handle digital audio these days, but Logic also has very deep capabilities for using virtual instruments and building complex arrangements, so as both a mixer and composer, I can accomplish anything I want in Logic and bring out every bit of magic in your music. The capabilities Logic offers allows me to build anything you need if some additional virtual instruments are called for. When I’ve got all your tracks loaded into Logic, I’ll first double check to make sure everything is there. At this point, there is no processing, no plugins, not even on the mix bus. I want to hear just the raw tracks. I’ll set up a basic balance with all tracks playing and start to establish basic panning positions, all the while paying careful attention to maintaining adequate headroom on the individual tracks and the mix bus. A quick side note - I realize this is on the verge of turning into a mixing tutorial, but you deserve to know my thinking and process, and why it works so well. Regarding panning, some well known mixers use what’s called LCR positioning (left, center, right), and place everything either dead center, full left or full right. Maybe it’s because of my classical background and years of listening to and playing in symphony orchestras, but LCR mixing would be the equivalent of taking a hundred piece orchestra and placing them into three columns on stage, one in the center, one all the way to the left and one all the way to the right, one player behind another. Aside from the fact that it would be impossible for the players to perform, it would sound awful. I position mix elements across the entire stereo image, like musicians performing live would be positioned. That way, every element of the mix has its own identifiable sonic space, which I enhance further with subtle EQ and effects for precise placement left to right, front to back, and with tone and timbre that brings clarity to every element, while at the same time making them easier to blend. There’s only ONE track that goes exactly in the middle - the lead vocal. Even the kick, snare and bass are very slightly, purposely, positioned the tiniest bit off center, in their own spaces. The subtle panning of those elements is virtually imperceptible, but my mixes speak with a special depth and clarity because of it - among many other tools and techniques I use. The next process is to clean up and edit anything that isn’t part of the music - a cough on the background vocal track, a thump where the trumpet player hit the mic stand. Once everything is clean - does the groove lock in? If not, I’ll nudge it until it does. Believe me, after years of playing with Frank Zappa, I can lock a groove even if it’s in 17/8. At the same time, I won’t turn your rhythm section into robots. With experience playing in both places, I know that if your track was recorded in New Orleans, it’s going to feel different than a track recorded in Memphis. Those special rhythmic flavors will stay and work their magic. I treat pitch the same way. I like things in tune, but not so rigid that it doesn’t feel human, unless you specifically want “the autotune” effect. Now that the music is taking shape, before addressing any individual track treatment, I put a few insanely wonderful plugins on the mix bus, selected and ordered according to what the music suggests. Over the years, I’ve fine tuned this process and constantly updated my arsenal of mix bus refining tools. This “top down” mixing approach simplifies and reduces any processing that might need to be done on individual tracks. A mix that’s not loaded up with a ton of plugins “just because you can” will always sound better, more open and natural, than a mix that has all the life squashed out of it by over processing. With the mix bus now bringing out more clarity, punch and glueing everything together, I mix “into it” and address individual tracks and how they interact. A lot of mixers start by tearing down the whole mix at this point, pulling up the kick, tweaking it in solo and “building” from there, with the lead vocal the last thing they bring in. That’s not my approach. If you build the track without reference to the lead vocal, once you bring it in, you will have to make numerous adjustments to the track you built because you will discover that the track is now in a battle with the lead vocal you neglected and left until last. What’s the most important element of the song? If
it’s a vocal song, the lead vocal is the centerpiece and
primary focus of attention. So that’s where I start. I
know the preliminary refinements I apply to the vocal a Photo Credit Hen Metsemakers With the vocal sound improved, I’ll focus on the primary support instrument, usually a keyboard or guitar, then bass and drums, only soloing when necessary. At this point the process becomes pretty free form, addressing things as they present themselves, and always watching individual and overall levels. With careful use of EQ, subtle compression and parallel processing if called for, the mix gradually comes alive and really starts to dance as one element hands off focus to another and another, all the while supporting the lead vocal. If it serves the mix, I may do some radical processing on parallel busses and blend that in very lightly with the primary sound to add warmth or maintain presence or add sparkle and excitement to emphasize a musical moment. It’s also time now to add spatial effects like reverb, and start digging into the very fine details of automating levels to bring out all the musical magic, from the special, spontaneous ‘off” thing the drummer did on the hi hat on the way into the bridge, to the slide the bass player threw in, responding to the glass in the piano. This is the secret sauce of subtle and creative use of technology to serve the music and bring it to life!If I’m doing your mix, I’m also doing your mastering with no additional charge, and I apply the same attention to detail in the mastering process, as well as the same superb level of tools and technology to sculpt the sound. STEP 7 - I will send you a high quality MP3 When I’m satisfied, which will only come after a great deal of focused attention and careful listening, I’ll send you a high quality MP3. Now it’s your turn to bring your best and listen repeatedly with focus and attention, using every reference system you have, different speakers, ear buds, headphones, the car, your laptop, and compare to reference music you know and like. STEP 9 - Send me details via email about any changes you
require After careful listening (I suggest taking a day or so), If there are adjustments you want, let me know via email and I’ll fine-tune the mix further to your preferences. After the first MP3 I send you, I’ll do three additional revisions for no charge. After the original mix and three revisions, further revisions will be charged appropriate to the length and complexity of the project. More often than not, either the first mix or the first revision is on the money. When you approve the final version via email, just send the balance due via PayPal and then I’ll send you a 44.1 or 48k WAV or AIF file at either 16 or 24 bit depth, whichever you prefer. I look forward to working with you and making your musical vision a reality!
For further details and to begin the
process,
contact me. |
Professional Expertise
Robert has toured, performed and/or recorded with the following top musicians:
Guitar
• Peter Frampton
• Buzzy Feiten
• Snuffy Walden
• Jeff Baxter
• Waddy Wachtel
• Michael Thompson
• Steve Vai
• Carlos Rios
• Mike Landau
• Mike Sembello
• Mike Miller
• Kal David
• Brain Ray
Keyboards
• George Duke
• T. Lavitz
• Neil Larsen
• Chris Cameron
• Billy Preston
• Benmont Tench
• Mike Finnigan
• Jim Cox
• Greg Phillinganes
• Freddie Ravel
• Tommy Mars
• Bobby Lyle
• Jai Winding
Bass
• Abe Laboreal
• Neil Stuebenhouse
• Tom Fowler
• Nathan East
• Reggie McBride
• Don Boyette
• Leland Sklar
• Bob Glaub
• Cliff Hugo
• Pops Popwell
• Reggie Hamilton
• Scott Thunes
Horns
• Ernie Watts
• James Pankow
• Albert Wing
• Chuck Findley
• Walt Fowler
• David Woodford
• Steve Madaio
• Nick Lane
• Nelson Rangell
• Dave Koz
• Tom Peterson
• Darrell Leonard
• Bruce Fowler
• Paul Carman
• Kurt McGettrick
Drums, Percussion
• Vinnie Colaiuta
• Land Richards
• Chad Wackerman
• Art Rodriguez
• Andre Fischer
• Mick Fleetwood
• Jeff Porcaro
• Dave Garibaldi
• Raymond Pounds
• Peter Escovido
• Ricky Lawson
• Rick Marrotta
• Carlos Vega
• Dallas Taylor
• Russ Kunkel
• Sheila E
• Aynsley Dunbar
• Ralph Humphrey
• Ollie Brown
• Tony Braunagel
• Ed Mann
• Morgen Agren
Vocalists
• Merry Clayton
• Jim Gilstrap
• Edie Lehman
• Phillip Ingram
• Bill Champlin
• Jon Joyce
• Darlene Koldenhoven
• Rosemary Butler
• Phil Perry
• Ron Hicklin
• The Waters
• Marilyn Scott
• Arnold McCuller
• Roger Freeland
• Sklyer Jett
• Ray White
• Ike Willis
A few of Robert (Bobby) Martin's Concerts, Tours, Recording, Video, and/or Television Appearances:
Andy Pratt
Andy Williams
Bette Midler
Billy Paul
Bobby Caldwell
Bonnie Bramlett
Bonnie Raitt
Boz Scaggs
Carl Anderson
Chuck Berry
Connie Stevens
Cybill Shepherd
David Sanborn
Delphonics
Etta James
For the Love of Frank
Frank Zappa (all tours & CDs from 1981 on),
George Burns
Gladys Knight
Glenn Frey
Jeffery Osbourne
Jim Messina
Kenny Loggins
Lenny Kravitz
Leo Kotke
Linda Hopkins
Lyle Lovett
Major Harris
Michael Bolton
Michael McDonald
Neil Young
O’jays
Orleans
Patti Austin
Patti Labelle
Prince
Queen Ida
RGA Productions: Frankenstein, Six Chixs, WRSO,
Return to Grace, Country Classics, Crusin' Classics,
Rock & Soul and many more.
Rita Coolidge
Robin Trower
Ronnie Milsap
Sergio Mendez
Sheila E
Spinners
Stephen Stills
Stevie Nicks
Stylistics
Taste of Honey
Teddy Pendergrass
The Blues Brothers
The Moody Blues
The Rippingtons
The Waters
Tito Jackson
Tony Orlando
Virado Cultural Festival with the Central
Scrutinizer Band
Wilson Pickett
Zappa Union Festival
Zappanale Festival
%20Martin)%20Banned%20from%20Utopia%20Fall%20Tour%20Hen%20Metsemakers91.jpg) t
first will continue to evolve with the mix, so I don’t
waste a lot of time tweaking the voice in solo at this
point. You do need to listen to tracks in solo
sometimes, but for the most part, it’s a mistake to
spend too much time in solo. I’ll do some subtle
enhancements to the vocal as needed and probably add a
light touch of compression to help keep it front and
center as I build the rest of the track. The real
detailed work of keeping the vocal where it needs to be
comes later with automation. I won’t squash the life out
of a vocal with drastic compression when it sounds much
more natural to keep it up front with carefully fine
tuned volume automation.
t
first will continue to evolve with the mix, so I don’t
waste a lot of time tweaking the voice in solo at this
point. You do need to listen to tracks in solo
sometimes, but for the most part, it’s a mistake to
spend too much time in solo. I’ll do some subtle
enhancements to the vocal as needed and probably add a
light touch of compression to help keep it front and
center as I build the rest of the track. The real
detailed work of keeping the vocal where it needs to be
comes later with automation. I won’t squash the life out
of a vocal with drastic compression when it sounds much
more natural to keep it up front with carefully fine
tuned volume automation.